tmux is what's known as a "terminal multiplexer," hence the name "tmux." tmux isn't the only terminal multiplexer but it seems to be pretty widely adopted.
tmux has two features that make it a very powerful tool for extensive command-line work:
-
tmux allows you to split a single session into multiple terminal "panes" or "windows", each running their own sessions within the one larger session.
This is where the "multiplexing" comes in. You can run separate commands in each pane or window. Essentially, a "pane" is a new command prompt inside a split screen, while a "window" is a new terminal screen altogether. I generally use only one window and multiple panes, as I've found it easier to track that visually than having multiple windows in the same tmux session.
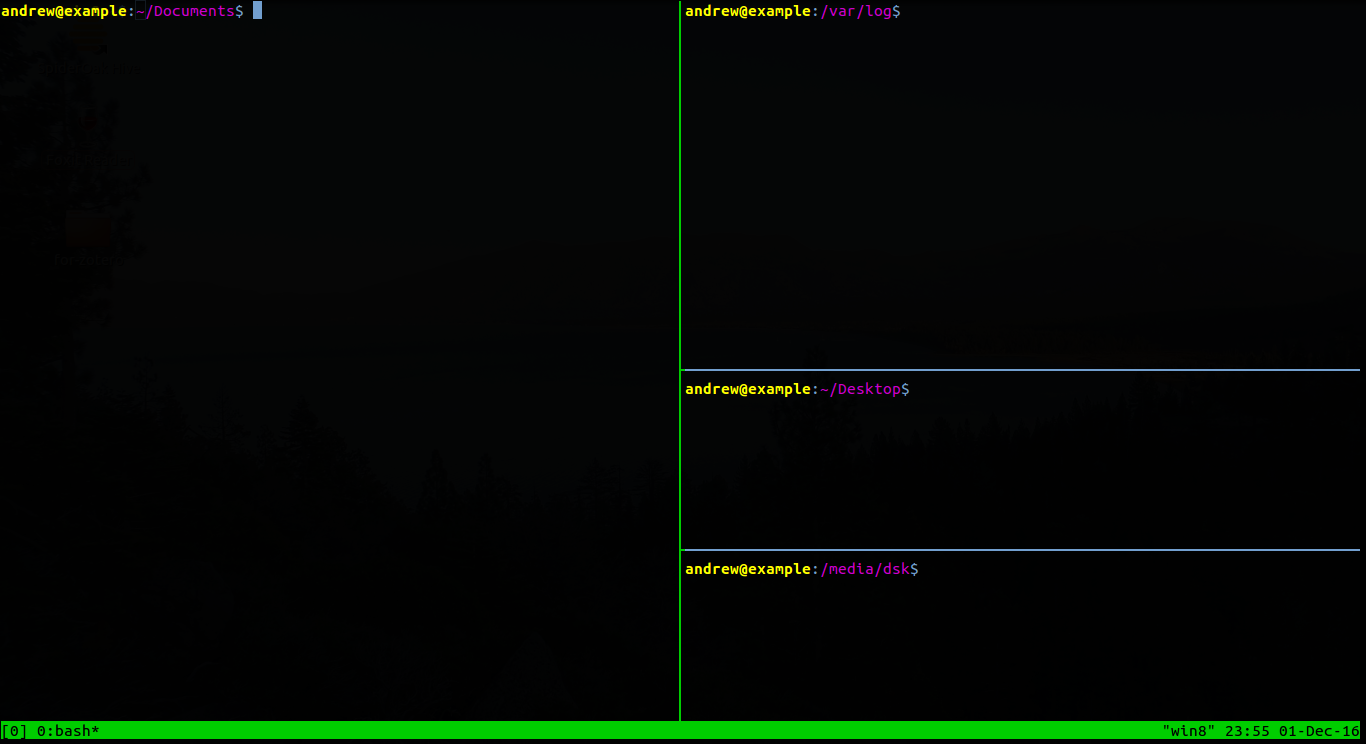
Here's an example of tmux running in one window with four panes. Note that each prompt is in a different working directory:
-
tmux allows you to run commands on a remote machine that will continue to run even after you disconnect from that machine.
In an ordinary terminal session, the commands that you run will only continue to run if you keep that same terminal open. If you close the terminal window or disconnect from the server while a command is running, that command will stop. This means that if you are connected to a remote computer over a network and run a command on that remote machine in an ordinary terminal session, you need to maintain the network connection for the duration of the command.
In a tmux terminal session, your commands are not linked to your currently running terminal window. This makes it possible to start a terminal session, start a command, and then leave that command running even after you disconnect from the tmux session and close the window. This way you can run processes that take hours or even days without having to keep the same terminal window and network connection open the entire time. A tmux session running on a particular machine will not end until you either end it yourself or the machine is shut down.
tmux basics
Installing
On Ubuntu, you can install tmux from the repositories:
$ sudo apt install tmux
It appears to be widely available in packaged form on other Linux distributions as well. On some server distributions it may come pre-installed.
Installing without root access
It's possible to install tmux without root access. The catch is that you have to compile it yourself, and maybe even compile its dependencies. There are many instructions on how to do this online, but the exact steps can depend on what's already available in your environment. In my case, I only had to compile one of tmux's dependencies (libevent, see below).
That said, the steps below have worked for me on an Ubuntu server in a shared hosting environment. I first did this in 2016 and now I can't find the original source for these instructions, so I'm pulling this from my bash history. If I can find the original source, I'll add a link to it, as I didn't work this out myself.
For what it's worth, I recently re-ran this after my hosting provider upgraded to Ubuntu 18.04, so I know it can still work. But I can't guarantee that it will work for you.
First, create directories for installation and gather tmux and its dependencies.
The tmux page lists the dependencies as both libevent and ncurses. In my web host's environment, I only had to install libevent to get tmux working. They must have already installed ncurses. Note that if you're following along at a later date, it may be worth checking the relevant release pages for newer releases than the ones I use below.
mkdir -pv "$HOME"/local # tmux will be installed here
mkdir -pv "$HOME"/temp # place to put the source releases
cd "$HOME"/temp
wget https://github.com/libevent/libevent/releases/download/release-2.1.8-stable/libevent-2.1.8-stable.tar.gz # download libevent source
wget https://github.com/tmux/tmux/releases/download/2.9/tmux-2.9.tar.gz # download tmux source
Next, compile libevent, using $HOME/local as destination:
tar -xvf libevent-2.1.8-stable.tar.gz
cd libevent-2.1.8-stable/
./configure --prefix=$HOME/local
make
make install
Now compile tmux, using $HOME/local again:
tar -xvf tmux-2.9.tar.gz
cd tmux-2.9/
./configure --prefix=$HOME/local CFLAGS="-I$HOME/local/include" LDFLAGS="-L$HOME/local/lib"
make
make install
At this point, tmux should be installed into "$HOME"/local/bin. Unless you're already using "$HOME"/local/bin for other commands, you'll also need to add that directory to your PATH so that tmux runs when you type just "tmux".
I added the following lines to "$HOME"/.bash_profile to add to the PATH:
if [ -d "$HOME/local/bin" ]
then
    PATH="$HOME/local/bin:$PATH"
    LD_LIBRARY_PATH="$HOME/local/lib"
fi
Now re-source ".bash_profile" to make the change take effect:
$ source ~/.bash_profile
Note: I can't remember why I ended up editing .bash_profile for this, instead of .bashrc. The uses of the various .profile, .bash_profile, and .bashrc files are a subject for a different post.
Mac OSX note
It appears that a different terminal multiplexer, screen, is installed by default. I've used it a few times and it looks like it has many of the same features as tmux. There's apparently a tmux vs. screen debate that's like the vim vs. emacs rivalry, which is to say, I've tried to avoid the arguments completely. If I ever use screen enough times, I'll write up a page for that too.
If you want to use tmux on OSX, you can install via homebrew, and probably also via other methods.
Starting and ending a session
To start a tmux session, simply type:
$ tmux
This will launch a new tmux session. You will see a clear terminal screen with a status bar at the bottom.
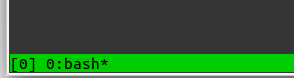
Unless you are running multiple windows and sessions, you don't really have to pay attention to the status bar, but it's there if you need it.
To quit from your session, simply type:
$ exit
tmux will output
[exited]
and will be returned to your command prompt as it appeared before you launched the tmux session.
Before and after a tmux session

Detaching and attaching
Exiting the last running tmux window or pane ends a tmux session. If you want to disconnect but leave the session running, you have two choices.
-
Use keyboard shortcuts
tmux comes with built-in keyboard shortcuts that let you control features like panes, windows, and sessions. Keyboard shortcuts usually follow the same two-step pattern:
a. Press a key combination that signals to tmux that you are using a keyboard shortcut
b. Press a single key that corresponds to an actionThe specific keys used in shortcuts seem to depend on your system settings. In systems I've used (mainly Ubuntu), the default combination for starting a keyboard shortcut has been:
[Ctrl] + [b]
The key that detaches your terminal from the current session is [d].
Putting that all together, to detach from a tmux session, I would press [Ctrl] + [b] and then press [d].
-
Type in a tmux command
Alternatively, you can control tmux by typing commands into the terminal and pressing enter. To detach, you would simply use a prompt within the tmux session and type
$ tmux detach
Detaching looks a lot like exiting: tmux will output
[detached]
to the terminal and you will be returned to the window as it appeared before you entered the tmux session.

To reattach to a session, type:
$ tmux attach
If you are running only one tmux session, this will re-attach you to that session. It will look essentially the same as if you had never detached from it, save for possible output produced by any commands you left running while detached.
If you are running multiple sessions, tmux will "guess" which session to reattach. I think it reattaches to the session you were last using, but I'm not sure. This is probably configurable.
If you are running multiple sessions and want to attach to a specific one, you can choose to do so.
First, get a list of running sessions:
$ tmux list-sessions

The number on the far left represents the number of each session. This numbering starts from 0 and increments for each session you start while another session is running. If you exit all sessions and then start tmux again, the numbering will start from 0 again.
It's also possible to name sessions; until I add that to this document, check out the tmux manual page for details.
Once you've chosen a session to reattach, you can specify it on the command line using the -t option. This command will attach your terminal to the session numbered "1":
$ tmux attach -t 1
Splitting into multiple panes
As with detaching from a session, tmux gives you two ways to split a window into multiple panes: using keyboard shortcuts or typing in a command. I recommend learning the keyboard shortcuts first and then learning about the commands.
Often you'll find yourself running a long command and then deciding you want to split the window to run other commands. You won't always have an open terminal prompt available for typing in an additional command.
The two shortcuts I use most often to split panes are:
- Split pane vertically [Ctrl] + [b] ; [double-quotation mark]
- Split pane horizontally [Ctrl] + [b] ; [percent symbol]
These shortcuts correspond to the following commands:
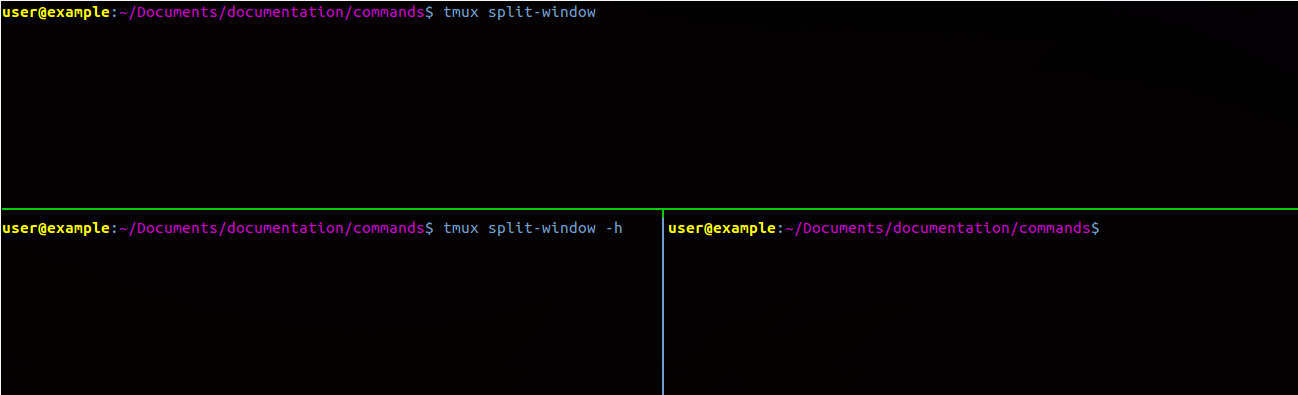
    $ tmux split-window # splits window vertically (this is the default)
    $ tmux split-window -h # the -h option specifies a horizontal split
Example: this window was split vertically and then the lower pane was split horzontally
Switching between panes
Ok, so now you have multiple panes, how do you move your cursor between them? Again, keyboard shortcuts are your friend. And if you are moving your cursor from a pane with an actively running command, keyboard shortcuts are practically your only choice.
The simplest way to move the cursor is with the following shortcut:
-
[Ctrl] + [b] ; [o]
This cycles through each pane, one at a time. The only drawback is that it goes in only one direction, so if you have many panes open you might need to cycle through almost all of them to get to the one you want.
Another useful shortcut is
-
[Ctrl] + [b] ; [semicolon]
This takes you to the "previous" pane, usually the one just above or to the left of your current pane.
Finally, you can also use the arrow keys
- [Ctrl] + [b] ; [up], [down], [left], [right]
These move the cursor in the direction of the arrow, assuming there is another pane in that direction. If you're fast enough, you can move the cursor across more than one pane at a time. Just be careful with the [up] arrow: since it also cycles through your bash history, you might find yourself entering a bash command when you meant to move up another pane.
Scrolling in a tmux window/pane
One drawback to tmux is that it creates an environment in which graphical tools like the mouse essentially don't exist. That may not seem like a problem, except for one thing: it means you can't use the scrollbar to scroll up on your terminal application window.
Instead, tmux has its own internal scrolling functionality, which is based on the keyboard. This is actually a great feature if you're connecting to servers that don't have any graphical terminal application (i.e. all you get by default is a command prompt that takes up your own screen), but takes some getting used to.
To enable basic scrolling functionality, use the following keyboard shortcut:
- [Ctrl] + [b] ; [left square bracket]
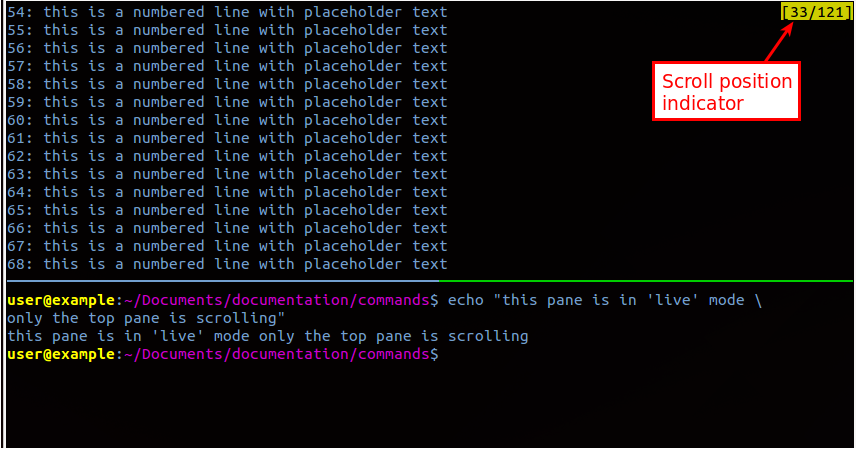
This puts the currently active tmux pane into scrolling mode. The other tmux panes will not be affected. While in scrolling mode, you can use the arrow keys to scroll up and down. A small box on the upper right of the pane indicates your current position and how many lines you can scroll back.
To quit from scrolling mode, just press [q] to be returned to the prompt.
Scrolling mode enables a lot of other useful functionality, such as the ability to copy and paste without using a mouse. See the manual page for more information.
Learning tmux from within tmux
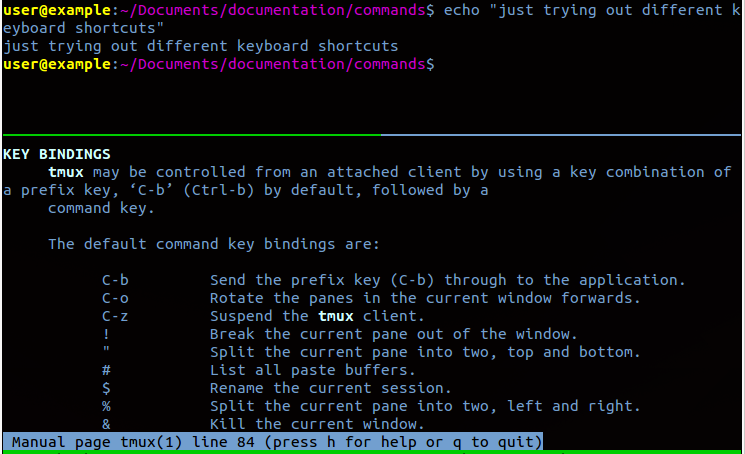
These basic commands should be enough to get you started. But one of the nice things about tmux is that you can take advantage of the panes feature to keep the manual page open in front of you while you practice using keyboard shortcuts or type in commands in another pane.
I did this a lot when I was starting to use tmux and still do it when looking up advanced features:
And of course you can view any manual page in any pane. If you become comfortable enough with tmux, you can use this strategy to work with any command. Sometimes it's easier to have the manual page in front of you instead of in another window.